- The Jewelry Obsessed
- Posts
- Polish Like a Superstar:
Polish Like a Superstar:
The Underrated Secret Skill Every Jeweler Should Master
Jenessa Dee
January 19, 2025
Hey, it’s Jenessa.
In today’s issue:
Deep Dive: Become a “Polisher Paul” and Elevate Your Jewelry (Don’t Worry, I’ll Explain!)…
Let’s Connect: Here’s how I can help you...
First time reading? Sign up here.
•PRESENTED BY THE ARTIST BURROW DESIGN + BUILD
•INTRODUCTION
The Secret Skill Every Jeweler Should Master
The most underrated skill for a professional jeweler working with cast jewelry is mastering the art of polishing.
And by polishing, I mean really polishing—trying to hit every crevice, every intersection, and every surface, meticulously removing casting skin while avoiding over-polishing or creating uneven waves in the metal.
It sounds simple, but it's a tricky skill to master!
Polishing demands incredible patience and a zen-like focus for the repetitive and tedious work.
Sometimes, it even comes with pain—like sanding your fingers raw with high-speed 1200-grit sandpaper in a micromotor, which occasionally happens to me when polishing platinum.
Don't worry... I'll spare you the photos and instead share my sneaky trick to minimize it in today's article.
This week is the grand finale of my three-part series about how to set up a professional jeweler's studio.
If you missed the past two weeks, don't worry- I've got you covered. Here are the links:
A word of caution...
I'm excitedly awaiting the renovation of my personal studio space, and I hope you can ignore the construction chaos and pink insulation in some of the photos.
Most importantly, remember there's no right way to set up a jewelry studio. What works for me might not work for you.
Building my studio took me decades of hard work, and I hope sharing my journey inspires you to start building your creative space.
Let’s get into it…
•DEEP DIVE
Learn to Be a “Polisher Paul”…
In my early twenties, I took a leap of faith.
I packed up my Toyota Camry, left the Midwest, and drove west to chase my dream of becoming an artist.
It was a bold, scary move that led me to opportunities that changed my life forever.
I landed in Seattle, WA, to study industrial design, and as a broke college student, I somehow managed to land a job at the largest custom jewelry design studio in the country.
This wasn't just any studio—it was magical.
Picture an enormous, light-filled space with soaring ceilings. Once an old restaurant, it was transformed into an energetic, creative hub featuring Mediterranean hand-painted floors and windows lining every wall.
Over fifty designers, jewelers, wax carvers, CAD modelers, and gemologists worked behind glass so clients could watch the jewelry-making process.
Among them was a jeweler I'll call "Polisher Paul," whose skills and personality made him unforgettable.
Like most artists, Polisher Paul was an interesting character with unique quirks...
Here he is, completing the 206-mile Seattle to Portland (STP) bike ride—an event that Bicycling Magazine calls "one of the best cycling events in the nation."
Here's the kicker…
He rode the ENTIRE route on a converted child-sized miniature bike and finished it in just two days!
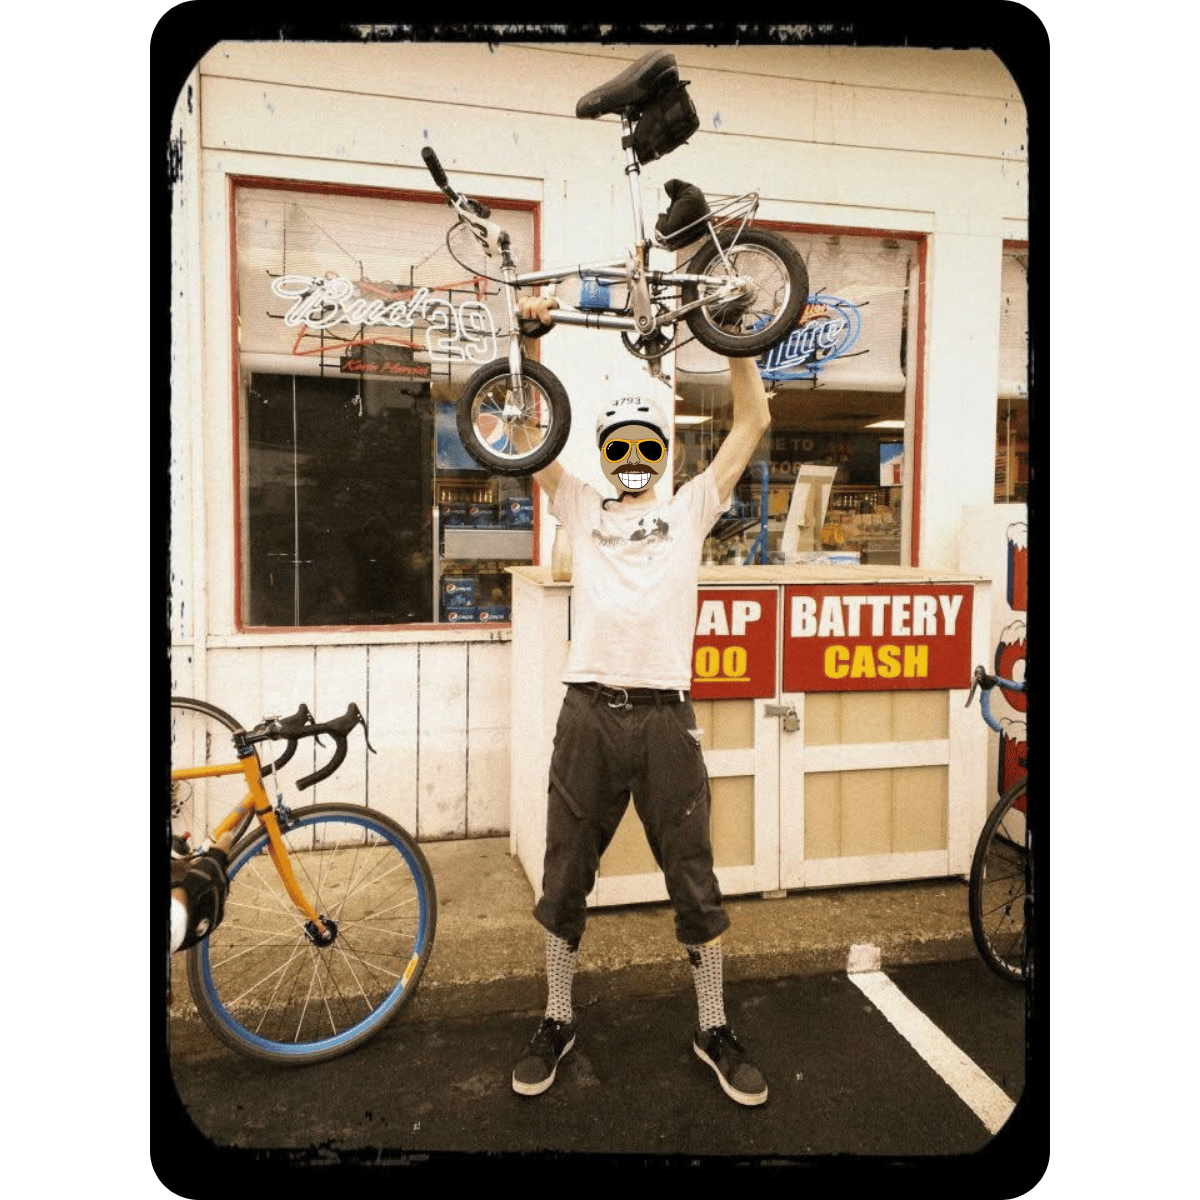
Crazy, right?!
Polisher Paul may have had some eccentric hobbies but was a phenomenal jeweler.
Polishing wasn't just something he was good at—he was a true superstar.
Whenever a piece with intricate details came through production, like a hand-carved or Celtic design, Polisher Paul took the polishing to the next level.
Watching him work and learning from him taught me something profound…
Sometimes success comes from mastering a skill set others overlook.
Let's fast-forward the story by twenty years...
Although I no longer live on the West Coast, I'm still living my dream as a working artist and professional jeweler, with experience working for companies nationwide.
And guess who the "Polisher Paul" is at my Minneapolis-based studio?
Yep, it’s me—for better or worse. 😂
Being an amazing polisher is an underrated skill that will take you a long way in your jewelry-making journey.
Here are the tools I use that will help you along the way.
•TOOL LIST
Simple Tools for Flawless Polishing Results…
First and most importantly, here are the tools to protect your health from compound dust exposure:
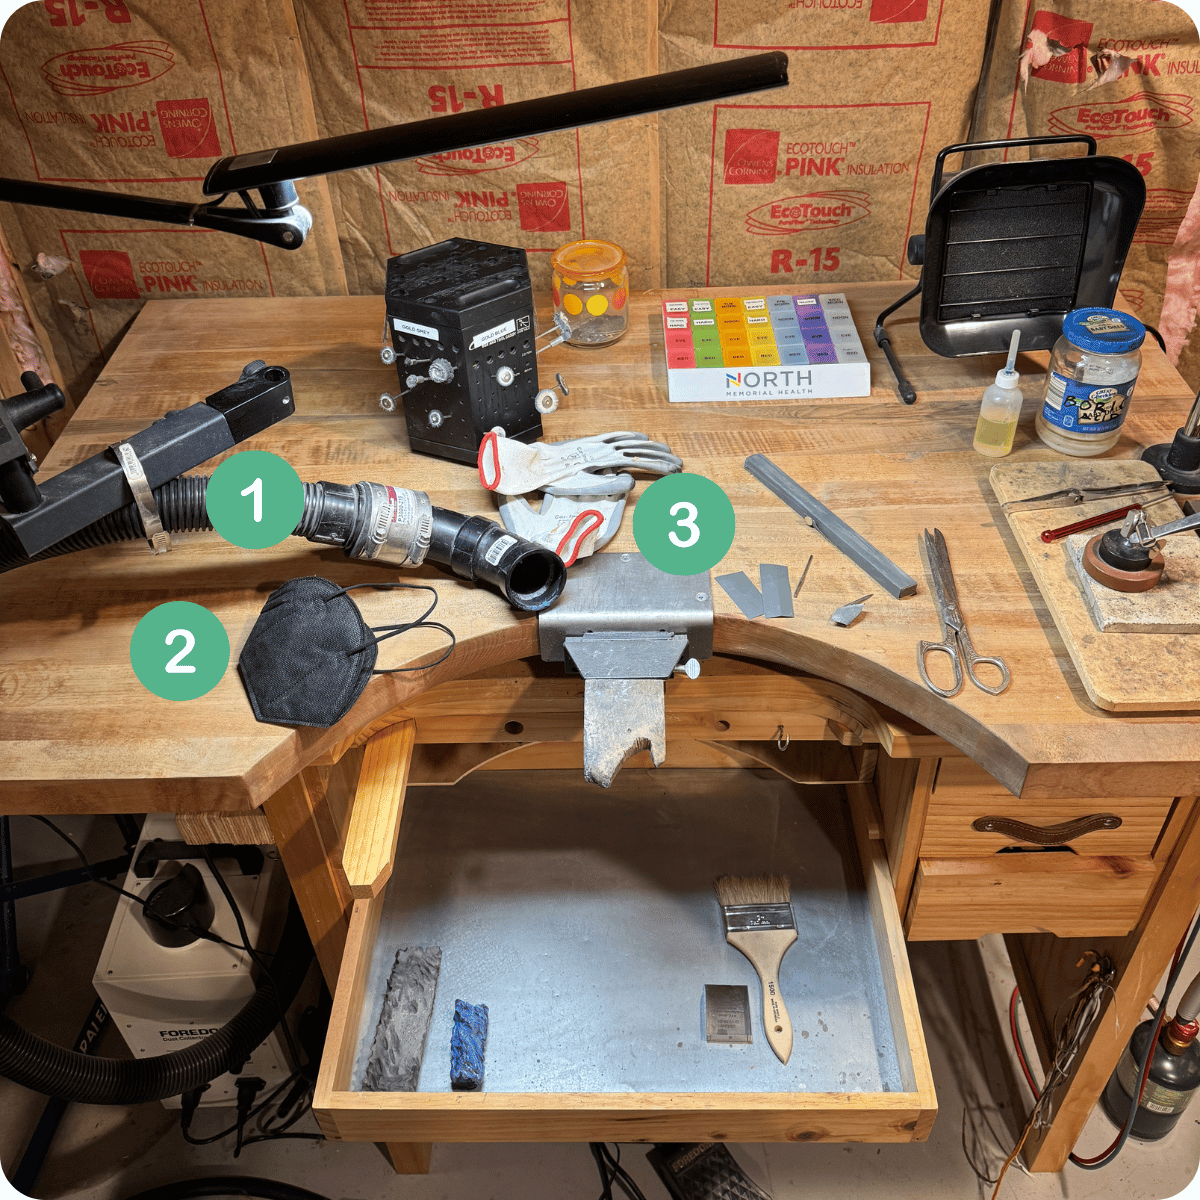
This Foredom Dust Collector is my favorite because of the cyclone chamber, which you can empty regularly without replacing the HEPA filter. Can’t afford the investment? Use this mini shop vac in a pinch.
An N95 mask.
Wear tight protective gloves or wash your hands immediately after polishing. I love this soap. It removes greasy compounds without drying out my hands.
👉🏻 PRO TIP: Always polish in reverse with your flex shaft or micromotor. Polishing in the forward motion blows dust directly at you, even with your suction on, exposing you and others in your shop to the airborne dust particles.
It will feel weird at first, but you will get used to it in no time.
Pre-polish tools
The pre-polish phase is where I spend the majority of my time.
During this stage, I focus on removing fine lines and refining the surface of the jewelry, bringing it to a pre-polished finish using 1200-grit sandpaper and above...
And the sandpaper has to be this exact brand.
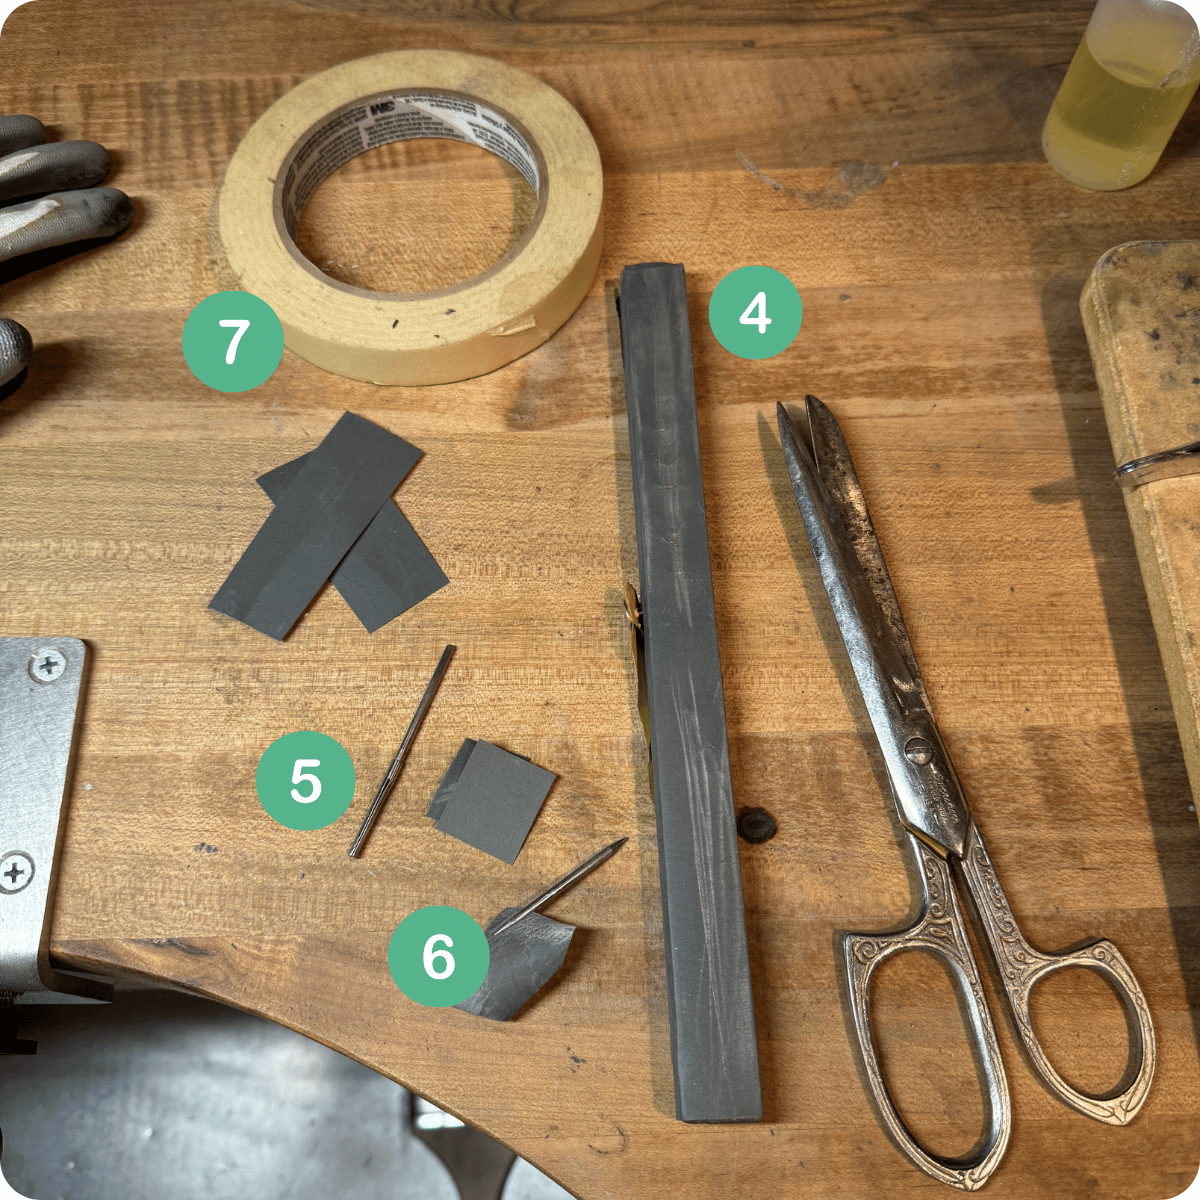
My most used pre-polish tools:
Sanding stick made with 1200-grit sandpaper for flat surfaces. (DIY)
A slim split mandrel with hand-cut sandpaper strips.
Pointed polisher (DIY).
💗 This is my favorite tool—it works like a polishing pencil, perfect for reaching very tight spots. I'll share a detailed guide in a future issue!
7. Masking tape. Why?!….
👇🏻 Remember that sneaky trick I mentioned at the beginning of this article to prevent your fingertips from being painfully sanded?
Here's the big reveal!
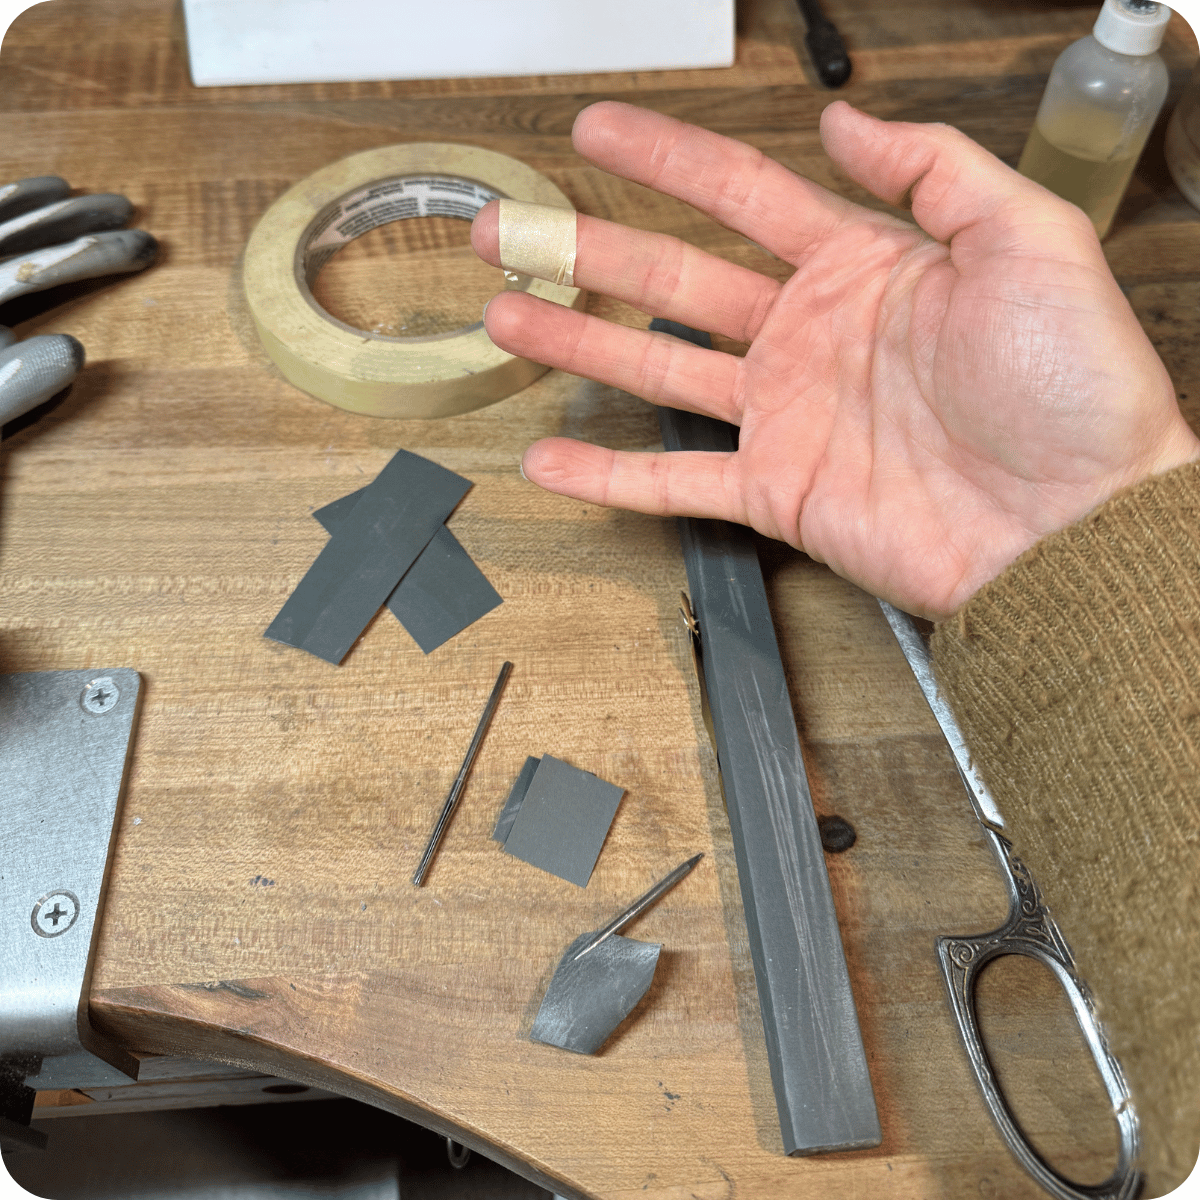
Unlike a bandage, it's the only protective barrier that won't get caught in a rotary tool... and it works!
The Secret to a Stunning High Polish (After You’ve Nailed the Pre-Polish)…
Here are the key techniques to achieve that flawless, mirror-like shine…
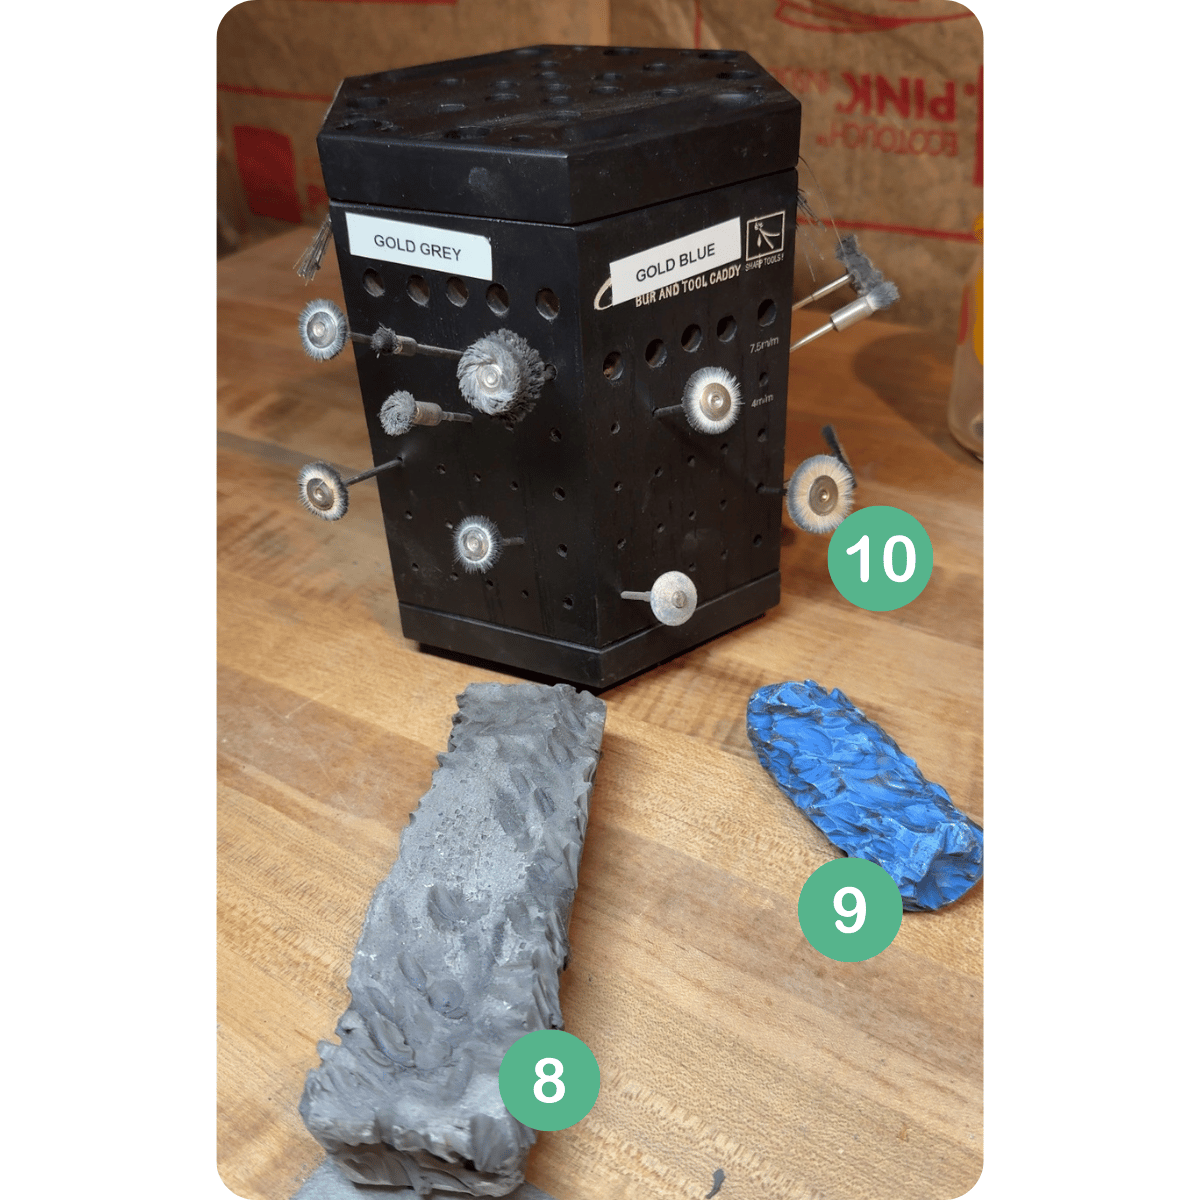
The first step is Greystar compound for cutting on an extra soft brush applied via flex shaft or micromotor.
Clean and steam the jewelry, then move to Picasso blue on a new brush to add a high polish.
These extra soft bristle brushes in 1” and 3/4” diameters are the brushes I use that help reach tight places. I also like these cotton brushes for the final round or gently hit your piece with Picasso blue on a tabletop spindle polisher if you have access.
❌ Do not mix compounds on your brushes and wheels.
FYI: I am NOT a fan of the brush caddy pictured above and do not recommend it. It has too many useless hole diameters for my tools. Stuller sold a beautiful natural wood caddy with practical hole sizes decades ago but discontinued it. 😭
I hope this helps with your polishing! A big thank you to everyone who joined me from TikTok. It was such a fun and supportive space, and while I'll miss that energy, I'm so glad to have you here!
•THAT’S A WRAP
Before you go: Here is how I can help…
Next week, by request, I'm covering GRAVERS….
Hit reply with any specific questions!
I appreciate you and respond to everyone I get.
See you next Sunday,
P.S. If you find my newsletter helpful, interesting, or insightful, please forward it to a friend to help me spread the word about The Jewelry Obsessed.

This email may include affiliate links, but don't worry—I only share products I use and swear by.